Blueberry Vanilla Jam – Easy Homemade Recipe
Blueberry Vanilla Jam Recipe: There are few things more delightful than a jar of homemade jam, and when that jam boasts the perfect marriage of plump blueberries and the warm embrace of vanilla, it’s pure magic. I’ve always been a sucker for the classics, but this Blueberry Vanilla Jam recipe takes things to a whole new level. Why do we all adore this particular combination? It’s the familiar sweetness of ripe blueberries, bursting with sunshine, beautifully complemented by the fragrant, comforting aroma of real vanilla bean. This isn’t just any jam; it’s an upgrade, a sophisticated twist on a beloved favorite that transforms your morning toast, yogurt, or even your cheese board into something truly extraordinary. Get ready to create a taste of summer that you can savor all year round. Let’s dive into making this incredible Blueberry Vanilla Jam together!

Blueberry Vanilla Jam Recipe
There’s something truly magical about homemade jam. The vibrant color, the burst of fresh fruit flavor, and that satisfying feeling of creating something delicious with your own hands. This Blueberry Vanilla Jam recipe takes classic blueberry jam to a whole new level with the subtle, aromatic warmth of vanilla and a surprising hint of complexity from balsamic vinegar. It’s the perfect balance of sweet, tart, and fragrant, ideal for spreading on toast, swirling into yogurt, or even as a topping for your favorite desserts.
The beauty of this recipe lies in its simplicity, yet the depth of flavor achieved is remarkable. The blueberries provide a natural sweetness and a beautiful ruby-red hue, while the vanilla bean infuses a sophisticated perfume that complements the fruit perfectly. The balsamic vinegar, used sparingly, doesn’t make the jam taste like salad dressing; instead, it adds a wonderful layer of acidity and a subtle savory note that cuts through the sweetness and enhances the blueberry flavor. Don’t be shy about it – it’s a game-changer!
Making jam might sound intimidating, but I promise it’s a rewarding and relatively straightforward process. The key is to be patient, follow the steps, and use good quality ingredients. This recipe is designed to be achievable for beginners, with clear instructions and tips to ensure success. You’ll be amazed at how quickly this jam comes together and how much better it tastes than anything you can buy in a jar.
Ingredients:
- 2 dry pints blueberries (20 oz/567 grams/roughly 4 cups)
- 16 oz sugar (454 grams/2 slightly generous cups)
- 1.5 oz lemon juice (freshly squeezed, 43 grams/3 Tablespoons)
- 0.5 oz balsamic vinegar (14 ml/1 Tablespoon)
- 1/2 vanilla bean (split and scraped, substitute 1 teaspoon vanilla extract at the end of cooking)
Cooking Instructions
Phase 1: Preparing the Fruit and Flavor Infusion
The first step in creating this delightful jam is to prepare your blueberries. Gently rinse them under cool water and then pick through them, removing any stems or bruised berries. You want only the best for your jam! If you’re using fresh blueberries, this is a simple process. If you’re using frozen blueberries, you can often use them directly from the freezer without thawing, which can actually help prevent them from becoming too mushy during the initial cooking stage.
Next, we’ll infuse that wonderful vanilla flavor. Take your half vanilla bean. Using the tip of a sharp knife, carefully split it lengthwise. Then, with the back of the knife, scrape out the tiny black seeds from each half. These seeds are where all the potent vanilla flavor resides! Add both the scraped seeds and the scraped vanilla bean pods to your large, heavy-bottomed pot or Dutch oven. The vanilla bean pods will continue to release their aroma as the jam cooks. If you can’t find a vanilla bean, don’t worry! You can absolutely substitute with 1 teaspoon of good quality vanilla extract. However, you’ll add the extract at the very end of the cooking process to preserve its delicate flavor, rather than cooking it down with the fruit.
Phase 2: The Simmer and Set
Now it’s time to bring everything together. Add the prepared blueberries, sugar, freshly squeezed lemon juice, and balsamic vinegar to the pot with the vanilla bean. Give everything a good stir to combine. The sugar will start to dissolve as the fruit releases its juices.
Place the pot over medium-high heat and bring the mixture to a rolling boil. Stir frequently to prevent the sugar from sticking to the bottom of the pot. Once it reaches a full boil, reduce the heat to medium-low to maintain a vigorous simmer. This is where the magic happens!
Continue to simmer the jam, stirring occasionally, for about 30 to 45 minutes, or until it reaches the setting point. How do you know when it’s ready? There are a few ways to test. The most common method is the “plate test.” About 20 minutes into simmering, place a small plate in the freezer. Periodically (every 5-10 minutes after the first 20), drop a small spoonful of hot jam onto the chilled plate. Let it sit for a minute, then gently push it with your finger. If the jam wrinkles and holds its shape, it’s ready. If it’s still runny, continue simmering and test again. Another indicator is the thickness of the mixture. As it cooks down, it will become noticeably thicker and more syrupy. You can also look for the jam to form “sheets” as it drips from the spoon, rather than individual drops.
During this simmering stage, you’ll notice that the blueberries will start to break down, releasing their juices and creating a beautiful, thick consistency. Skim off any foam that rises to the surface with a spoon; this will result in a clearer, more appealing jam. If you’re using the vanilla bean pods, you can remove them at this point, or leave them in for a more rustic look (just be sure to warn anyone eating the jam about them!). If you are using vanilla extract, now is the time to stir it in.
Phase 3: Jarring and Storing
Once your jam has reached its perfect setting point, remove the pot from the heat. Carefully ladle the hot jam into clean, sterilized jars. Leave about 1/4 inch of headspace at the top of each jar. Wipe the rims of the jars with a clean, damp cloth to ensure a good seal. Place the lids on the jars and screw them on tightly.
You can either process these jars in a water bath canner for long-term storage, or you can simply let them cool completely at room temperature, then store them in the refrigerator. Refrigerated jam will typically last for several weeks, while properly water-bath canned jam can last for a year or more.
Let the jam cool completely before storing it. You’ll notice it will thicken up even more as it cools. The aroma that fills your kitchen during this process is simply divine! Enjoy your homemade Blueberry Vanilla Jam – a true taste of homemade goodness.
Conclusion:
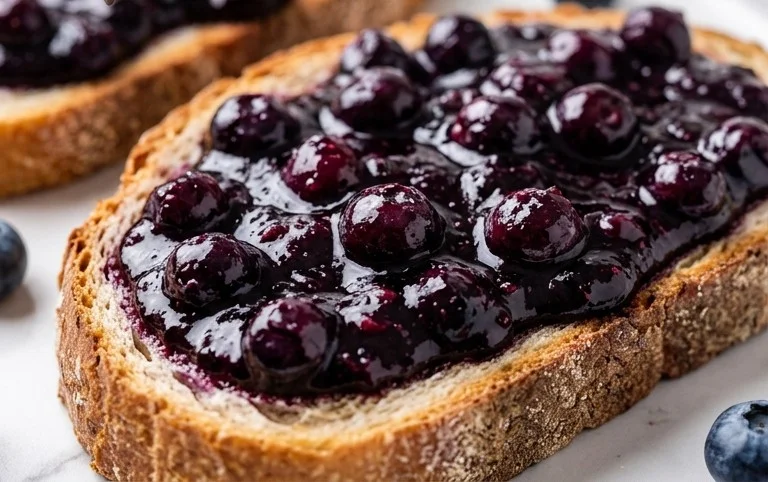
There you have it – a wonderfully simple yet incredibly rewarding Blueberry Vanilla Jam recipe! This jam is truly a delight because it balances the bright, slightly tart flavor of fresh blueberries with the warm, aromatic sweetness of vanilla. It’s incredibly easy to make, even for beginner jam makers, and the results are so much better than anything you can buy in a store. The vibrant purple hue is absolutely gorgeous, and the aroma that fills your kitchen as it simmers is pure bliss. I’m so excited for you to try it!
This Blueberry Vanilla Jam is incredibly versatile. Imagine it slathered on warm, buttered toast, dolloped onto a scoop of vanilla ice cream, or swirled into plain yogurt. It’s also fantastic as a filling for cakes and pastries, or even as a glaze for beef or chicken. For a delightful twist, consider adding a pinch of cardamom or a splash of lemon zest along with the vanilla. Don’t be afraid to experiment and make this recipe your own! I wholeheartedly encourage you to give this Blueberry Vanilla Jam a try – you won’t regret the delicious outcome.
Frequently Asked Questions:
Can I use frozen blueberries for this recipe?
Absolutely! Frozen blueberries work wonderfully in this Blueberry Vanilla Jam recipe. You can usually use them straight from the freezer without thawing, although they might release a bit more liquid. If they seem particularly watery, you might need to simmer the jam a little longer to reach your desired consistency.
How long will this jam last?
When stored properly in a clean, airtight jar in the refrigerator, this homemade jam should last for several weeks, typically around 3-4 weeks. For longer storage, you can explore canning methods to preserve it for much longer periods.
What kind of vanilla is best to use?
While you can use good quality vanilla extract, I highly recommend using a vanilla bean for the most intense and authentic flavor. Simply split the vanilla bean lengthwise and scrape out the seeds, adding them to the simmering blueberries. The seeds will infuse a beautiful spekled appearance and a richer vanilla essence into your jam.
Blueberry Vanilla Jam Recipe
A delightful homemade blueberry jam infused with the subtle aroma of vanilla and a hint of balsamic tang. Perfect for toast, scones, or as a dessert topping.
Ingredients
-
2 dry pints blueberries (20 oz/567 grams/roughly 4 cups)
-
16 oz sugar (454 grams/2 slightly generous cups)
-
1.5 oz lemon juice (freshly squeezed, 43 grams/3 Tablespoons)
-
0.5 oz balsamic vinegar (14 ml/1 Tablespoon)
-
1/2 vanilla bean (split and scraped)
-
1 teaspoon vanilla extract (optional, to add at the end if not using vanilla bean)
Instructions
-
Step 1
Combine the blueberries, sugar, lemon juice, and balsamic vinegar in a large, heavy-bottomed pot or Dutch oven. If using a vanilla bean, add the scraped seeds and the pod to the pot. -
Step 2
Stir everything together and let it sit for about 15-30 minutes to allow the sugar to start drawing out the juices from the blueberries. -
Step 3
Place the pot over medium-high heat and bring the mixture to a boil, stirring occasionally. Once boiling, reduce the heat to medium-low to maintain a gentle, steady boil. -
Step 4
Cook for 20-30 minutes, stirring frequently, until the jam thickens and coats the back of a spoon. Skim off any foam that rises to the surface. If using a vanilla bean, remove the pod before the jam reaches desired thickness. -
Step 5
If you didn’t use a vanilla bean, stir in the vanilla extract at the very end of the cooking process. -
Step 6
Test for set: place a small spoonful of jam on a chilled plate. If it wrinkles when pushed with your finger, it’s ready. Otherwise, continue to cook for a few more minutes and re-test. -
Step 7
Ladle the hot jam into clean, sterilized jars, leaving about 1/4 inch headspace. Wipe the rims, apply lids and bands, and process in a boiling water bath for 10 minutes if canning for shelf stability. If not canning, let cool and store in the refrigerator.
Important Information
Nutrition Facts (Per Serving)
It is important to consider this information as approximate and not to use it as definitive health advice.
Allergy Information
Please check ingredients for potential allergens and consult a health professional if in doubt.

